I Guarantee I Can Teach You to Master Photoshop. Learn How:
It’s time to correct red skin captured in your images. Here is how to do it, quickly.
One of the problems you will encounter when photographing people is skin redness. It usually shows up around the nose, close to the eyes and on the cheeks. Skin that looks too red can make people look tired, sick, old, or just bad.
Thankfully there is a simple fix that will work every time.
Using a Hue/Saturation Layer
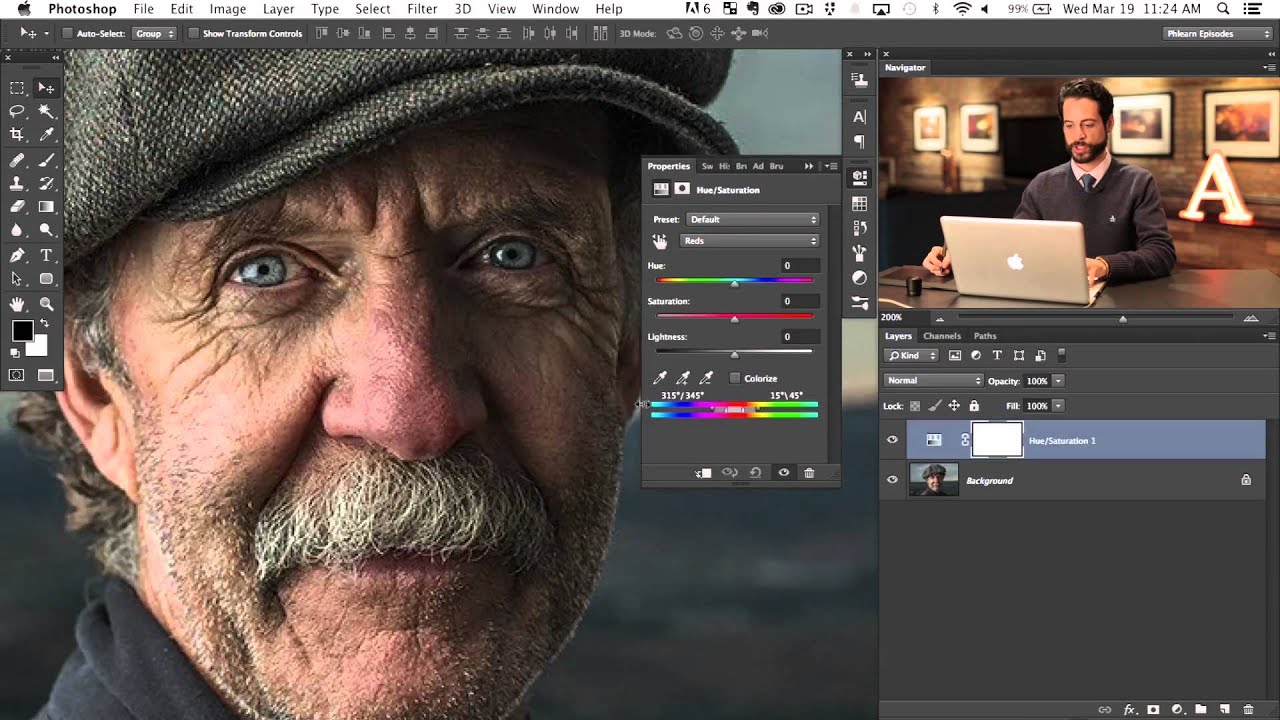
In this episode we show you how to use a Hue/Saturation adjustment layer to pinpoint the redness and get rid of it for good.
We start by selecting REDS from the drop down menu that is on MASTER by default. After selecting the reds we bring up the saturation as high as possible to see what colors we are actually effecting. Then we use the slider on the bottom to narrow in the focus of color and move it left and right until only the area we want to change becomes highlighted.
After the selection is bright red, bring the saturation back down to 0 and adjust the Hue slider to the right. In this image we use a +25 Hue but that will change depending on the colors in your image. Once you set the Hue correctly you are done!
If you thought this episode was great our “Pro Tutorials” are about 10 times better, more in-depth detailed information, and are priced perfectly for the photographers and photoshoppers wanting to become the best. Of course we teach it the right way, you just have to get access to the lesson check out
Make sure to subscribe to our Youtube channel for great videos, hangout with us on Google+, like us on Facebook, chat on Twitter, and capture moments on Instagram. All of our accounts have something fun to offer.
Phlearn Accounts
Website:
Youtube:
Facebook:
Twitter:
Google+:
Instagram:
THANK YOU! Very easy directions for a beginner like me!
Thanx a LOT !!!! 😀
Nice tip!
Thanks boss, that was really hopeful. So simple and affective.
Thank you for the tutorial. However, how we can correct reds in a picture with similar reds in the background or clothing? How to we affect, let's say, only the face?
Hero status achieved! My Gal is not a fan of portraits I take of her as her Irish skin is quite blotchy, this completely changed her mind about it!
You just saved me SO MUCH TIME. Thank you!
THANK YOU for this!
now you forgot to explain how to reverse the areas you dont want to be adjusted (the eyes area you mentioned for example) ….
Man if that red nose is bothering you….
Very nice and easy! 🙂
hi thanks for your video … but I need some help in how to correct magenta.. ?? plz
Ok. So a client has extremely red skin. I’ve done this technique on others and it’s worked perfectly. Thank you for that btw. But, this particular subject, it almost makes them look dead whilst taking the red out. Any suggestions on how to help with this issue?
My photoshop cc 2018 doesn't have the bottom sliders where I can select what areas I want to make less red :/ I'm not sure what year you have or why mine is lacking that.
I used this on after effects for video, super helpful.
But you also removed the red from the lips.
Wanted this to work so badly but no matter how hard I tried this wanted to take the color out of my red head's lips in addition to her red arms!
Thank you! That was easy and exactly what I needed.
thank you!
Awesome tutorial, helped me out a lot!!
is this also available in Photoshop elements?
This video was a life saver!!!
Excellent, very helpful, thank you. I imagine that in most cases you would have to mask out the lips so that they are not affected.
Selective colour mask – select reds and set black to -100% – invert it and paint over the red area with soft white brush on low opacity.
How to do something like that with yellow?
Thanks short and sweet
All joking aside, I generally use the eyedropper to select the range first, then tweak the sliders as necessary. But I never thought of cranking up the saturation to give a visual preview of the selection. Excellent tip!
LOL! This video has an orange cast.
Will this method work the same for jaundice skin?
Hi, I wonder if someone could help me out here. I applied this method and it works great. However, how can I keep the lips the same, because the redness vanishes there too?
i like your video but i didnt see theam.why becouse you talking so much .men safe time and say import tihnk and stop show your self.ty
love this tutorial, your background staging is epic too, thank you so much
How would you fix a ruddy / red complexion on a redhead? Adjusting the complexion also adjusts the hair color….. is there a way to separate the two features?
HEY ITS COOL GUY! I know that music…