How To Change to Studio Photography Design Background in Photoshop Elements 2018 15 14 13 Tutorial
Photoshop Elements Change Background
► Get my Complete Training Courses Online
► Get my Complete Training Courses on DVD – Amazon
The BEST way to learn Photoshop Elements is with my complete training courses along with my YouTube projects. It is the perfect learning system.
————————————————————————–
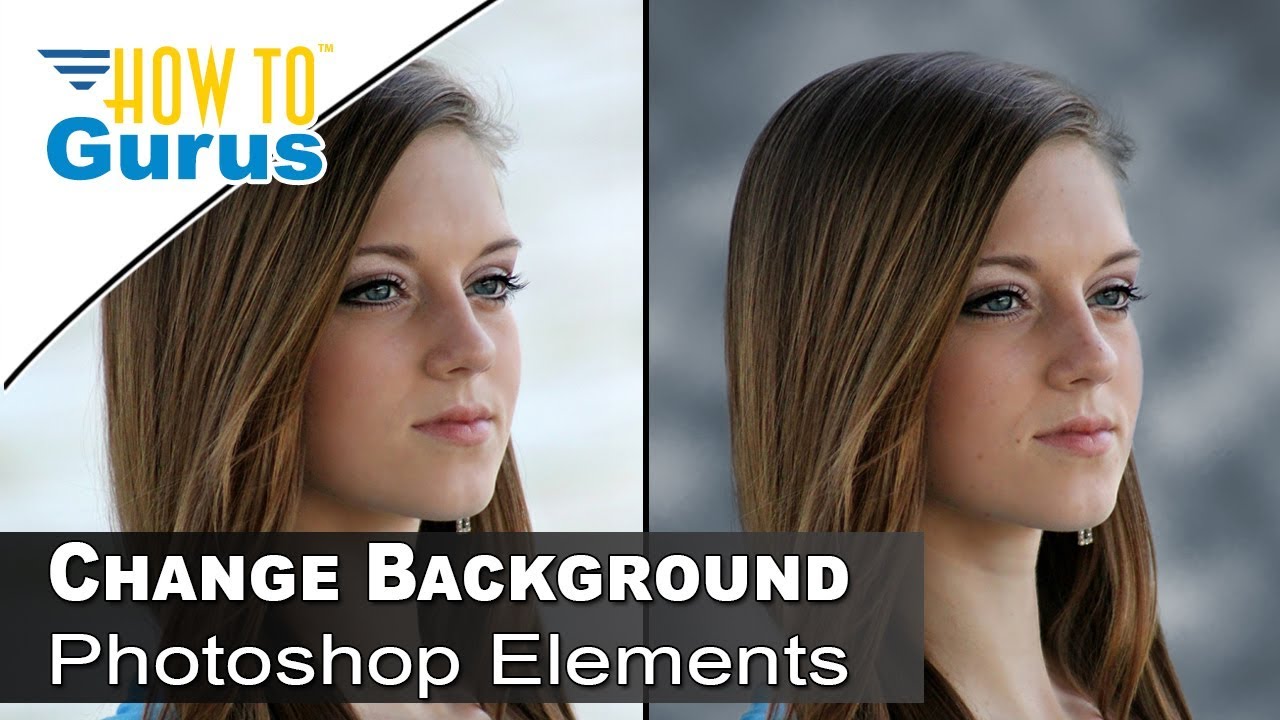
How to change the background of a portrait photograph to a custom studio style background in Adobe Photoshop Elements.
Download Project Files here
Here is how to set up Floating Document Windows
In this Photo Manipulation video I use layers, layer mask, selections, refine edge, the cloud filter, burn/dodge and more.
This comprehensive video takes you step-by-step through the complete process from beginning images clear through to the final composite image. This training demo was recorded in Photoshop Elements 13 but the techniques used will work just as well in Photoshop Elements 11 through the latest Photoshop Elements.
________________________________________________________________
This is just one of my numerous Photoshop Elements online tutorials. You can view more Photoshop Elements Tutorial Videos in these YouTube Playlists:
Adobe Photoshop Elements Essentials
Adobe Photoshop Elements Holidays
Adobe Photoshop Elements Photo Retouching
________________________________________________________________
“Like” this video by clicking on the thumbs up.
Click the Share link and share this video with your friends on Facebook, Twitter, Google+, and other social networks.
Don’t forget to Subscribe to my YouTube Channel
Follow Me:
Facebook:
Twitter:
Pinterest:
video and description copyright 2016 George Peirson all rights reserved
Hi George, What another great video. The pictures just really come to life. I have said this before and you are just so great at this. Thank you……..Eileen
Thanks
How is the photo one of the layers?
when I drag my image into the white background my image is Huge and it impossible to resize. What am I doing wrong?
you skipped some steps
Thank you, I finally able to change background with any photos!
Thanks so much for the video. very easy to follow!
Thank you so much for this tutorial. I've been struggling so much with doing this and now I'm finally able to!
Another great video, George!
great job. I learned a lot.
Hi, I am trying to follow your video and so far it's been going well except for the fact that no matter what I do I can't seem to be able to move the photo around within the screen. I am even using the same photo that you're using and my rulers are on the picture…HELP!!!
Please.
So Helpful and interesting video's
Awesome work! Really nice!
Please how did u make the first photo that has measurements on the side from the beginning. Get lost from the beginning cos I don't know how to put 2 pictures on the screen
hii plz tell me how to get floating layout in my elements 14
when I try to add the white background, the white background is too small for my image. How do I find the correct width and height?? Thank you
This was just perfect! Thanks a lot.
How do I get to where the picture is in the ruler frame? I bring in the picture and I have rulers checked but there is not a ruler and I can't move the picture.
hi i am sure this is going to be a really stupid question but how do you get that measuring tape effect on the left side of the pictures like that? i Cannot Figure it out. thanks.
Hi George, I know this is a stupid question. I am a makeup artist who is getting into Pictures to show my work. I been doing a lot of your tutorial's, so I am like NEW, real new. I am using PS15. All my picture's, are clipped to the board when I open them in PS. I see you moving them around. How do I do that?
Why not use Filter-other-Mininum/Maximum to get rid of the halo type disparity instead of just using the burn tool to paint it in?
Hi my friend. I have one photo that i want put it the background same like that. My Problem is i did that photo outside and i can not doing good selection between her hair and the background. Please can you help me?
I reviewed this video to see how to remove the halo effect that I was having issues with. The burn tool at 50% works fine!
Thanks George!
Rich
Again fantastic job.
Great video! I'll have to rerun it several times before it completely sinks in, but this is one of those "wish I knew this before now" techniques. Thanks for another eye-opening lesson.
One again. great video.!!!!!
George, I went through this lesson about 4 times just to make sure I got all the pointers, now I am off to testing this out. What a great selection you made in record time using the lasso tool! The "halo effect" is a big problem using the refined tool, the back and forth on the picture or mask, is the best way to get great results. I had issues with the burn tool to start with because of the amount of strength I was using, once you tune it down, works great! Thanks again, this a simple concept but one that was very, very important! Your background idea is good for many reasons, I like the ability to be creative and control color. The right color combination is the difference between a so so photo and one that really pops or complements the subject. Wanted to know if you could do a walk through on shappening photos, the correct balance here is the problem area again. That is, between sharpening the ranges and having to deal with too much much noise, this is a fine line and often I don't pick up on my mistake till later. I appreciate your consideration on the matter.
Thank you for all you do!
Rich
Outstanding as always. Thanks
like