I Guarantee I Can Teach You to Master Photoshop. Learn How:
Make Eyes Look Amazing in Photoshop
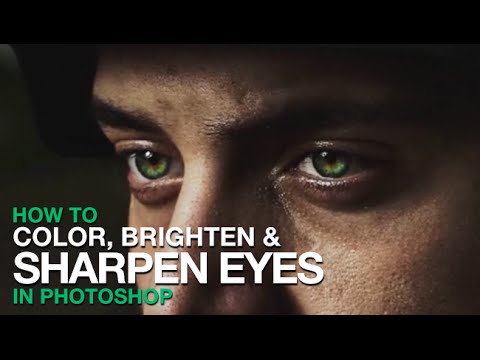
If you have ever seen amazing eyes in a photo there is a good chance that it has been edited in Photoshop. Enhancing a person’s eyes in Photoshop is a quick way to make an image really stand out.
In today’s episode we show you how to use the natural colors of an eye to enhance its color depth. You will also learn how to properly dodge and burn an eye to make it stand out.
Coloring the Eye
There are many ways to color a person’s eye in Photoshop. This method uses the natural color of the eye as a base for new color. Start out by creating a new layer and sampling the color from the inner part of the eye. Next open your color palette and increase both lightness and saturation. This will give you a more vibrant version of the same hue. Then paint over the inner part of the eye, covering where the original color was. Do this a couple of times, sampling colors from around the eye.
After all of the colors are painted, change your layer blending mode to “Soft Light” or “Overlay” to allow the color to blend into the eyes. Then make sure to use “Gaussian Blur” to soften the edges of where you painted.
The eyes should be quite a bit more vibrant but still look natural.
Dodging and Burning the Eye
In this episode we use curves adjustment layers to brighten the center part of the pupil and darken the outer edges of the pupil. This change will give the eyes more depth and light.
Sharpening
The final step is to sharpen the eyes. You may already be sharpening your whole image, but just sharpening key areas (like the eyes) is a great way to draw more attention to those areas.
If you thought this episode was great our “Pro Tutorials” are about 10 times better, more in-depth detailed information, and are priced perfectly for the photographers and photoshoppers wanting to become the best. Of course we teach it the right way, you just have to get access to the lesson check out
Make sure to subscribe to our Youtube channel for great videos, hangout with us on Google+, like us on Facebook, chat on Twitter, and capture moments on Instagram. All of our accounts have something fun to offer.
VISIT PHLEARN.COM FOR MORE FREE TUTORIALS
SUBSCRIBE TO OUR CHANNEL FOR MORE FREE TIPS AND TRICKS
GET FREE TUTORIALS IN YOUR EMAIL + DISCOUNTS ON OUR PRO TUTORIALS!
BUY THE TABLET AARON USES!
LET’S BE FRIENDS!
Instagram ►
Facebook ►
Twitter ►
Google+ ►
Phlearn ►
————————————————————————————————————-
#phlearnmethod – Photoshop Made Simple.
Download Your Free 5 Pack Today –
Wow what a cool technique! Any chance that you've come across even more tips for the eyes since making this video 5 years ago? Would love a follow-up!
A-maze-balls. Thank u so much. Brilliant video
Enjoy ur videos sooooooo much and ur humor 🤣 love it
Amazing!!!!!
I would like to see a video on just your facial hair because it changes so much. You got some styles, my dude
I lost your direction when group selecting the layers and selecting overlay/soft light. For some reason it's affecting the whole image rather than just the eyes when the eyes are all I worked on in those layers.
I just found Aaron and PHLEARN last weekend. I also just shot the entire last week in the most instructive manner. I enjoyed your presentation as well as your humor; looking forward to more. Thanks for taking the time to instruct and share.
GREAT !!!
I really like your channel but I'm a newbie so if you can speaker lower next time I'd really appreciate it! ^^
so, yea…my phlern finally arrived today,
but it's all droopy right out of the box!
is like, a stand sold separately or something?
THANK YOU SO MUCH Aaron! I've been looking for this for a long time and will use it often!
what about very dark brown eyes with no sparkle/light
So: Lighten eyes, then darken eyes, then blur eyes, then sharpen eyes… profit??
why I stuck with paiting with white, my pencil doesnt pain???????help!!!
so helpful. thank su
aaron you`re the best!
Great tutorial. Question, how do you apply this technique to eyes that are a deep brown with very little definition?
You are like a Photoshop God!
This was an amazing tutorial, thank you so much!
Great video man, helped a lot. Keep up the good work!
p.s. nice stache
it was done at 9:55
Awesome tutorial. What about black eyes? any trick?
He is a good YouTuber and a best tecaher 👍 keep it up.
It was amazing, great work and nice skills ! Thanks for tutorial
Thank you!!!!
Super helpful!
Love your video forever!!!