Learn how to insert Clip Art in Ms Word. Furthermore, learn with the help of this tutorial how to edit and add effects to pictures in Word.
Don’t forget to check out our site for more free how-to videos!
– our feed
– join us on facebook
– our group in Google+
It is usually said that pictures have more impact on a reader than mere words do. Ms Word allows its user to insert pictures and clip art in word documents. So in this tutorial, you will learn not only how to insert clip art and pictures in your text but also how to edit the pictures that you have inserted.
So in this tutorial, you will specifically learn how to work with Pictures and Clip Art in Microsoft Word.
Step # 1 — Search a clip art
You can add clip art in Word documents. To start working with clip art, go to the ‘insert’ tab and click on the ‘Clip Art’ button. After this a new window will open on the right hand side of the page. If you are looking for some specific clipart, then type in the words in the ‘Search For’ field and press the ‘Go’ button. As soon as hit the ‘Go’ button, you will see different clip art images right below. Pick the one that suits your requirements. Once you have decided which clip art you want to insert, click on its drop down arrow to view the options. Click on the ‘insert’ option to add the clip art in the document.
Step # 2 — Wrap text
After the picture has been inserted, the ‘format’ tab is shown automatically under picture tools heading. You can move the picture anywhere by dragging it. In the ribbon, there is an ‘Arrange’ section where you will find the ‘Wrap Text’ option. Give it a click and select how you want to place the picture with the text. Let’s say you choose the ‘Through’ option. This option places the clip art anywhere in between the text by moving the text aside. To delete the clip art, simply select the picture and then press the ‘delete’ key.
Step # 3 — Insert a picture in a document
You can also insert any other picture other than clip art in your document. Simply, go to the ‘insert’ tab and click on the ‘picture’ button. A new window will open up from which you will be able to browse for pictures and select the picture you want to insert to your document. You can adjust the size and position of the picture. Furthermore, you can also adjust where you want to place it; in between text, in line, at top or bottom using the ‘Wrap Text’ button.
Step # 4 — Editing in picture
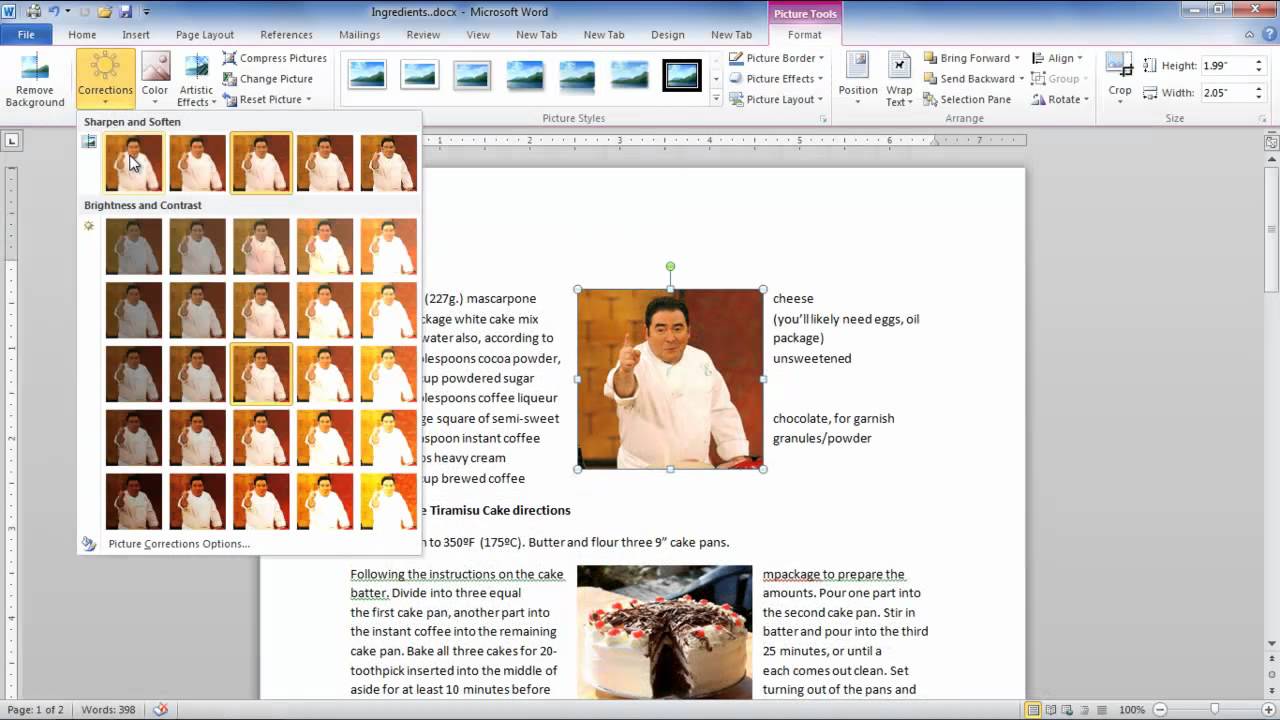
Like any other photo editing software, Ms Word also provides handful options for editing photos. Once you have inserted the picture, you can adjust its sharpness, softness, brightness and contrast by going to the ‘corrections’ drop down button. As you hover over each style, you will see respective live previews.
Step # 5 — Compress Picture
Sometimes pictures taken from the digital camera are too big in size and take a lot of space in the document. To get rid of this problem, you can compress them by going to the ‘compress pictures’ button in the ‘Adjust’ section. After you click on it, you’d be presented with a few options. Configure the compressing settings and then press the ‘OK’ button and your picture will be compressed.
Step # 6 — Picture Styles
In the format tab of picture tools is the ‘Picture Styles’ section. Hover over each style with the cursor and you will see the live preview. Make the choice as per your requirements.
Step # 7 — Picture Effects
‘Picture effects’ option shows you a variety of effects that can be applied to the picture. Go to the ‘picture effect’ drop down arrow and you will be presented with different options; each option consisting of sub-options gives you a wide range of styles and effects for a picture. It consists of preset, shadow, reflection, glow, soft edges, Bevel and 3D rotation effects. Apply picture effects as per your requirements.
So I have the chrome Asus not show the glow effect how would you get to it
Look in related videos on right hand side of video used in previous step and choose one
Clear, concise—most helpful. Many thanks.
Thank you it worked!
You sound like a machine
thanks for your help c: