I am a professional photographer who also shoots for fun, casually, almost daily. I have a 2 year old. So I’m often running around to parks or parties with her. And I want to bring a camera everywhere I go. I was using a lightweight camera backpack that is designed for hiking in these situations. I wanted to dedicate that for just hiking and find something a little more stylish and practical. So I was searching for a stylish backpack for casual use. I was lead to the Ona Camps Bay backpack which is approx triple the price of this Portage bag. I got this bag for $149. I feel that this bag was inspired by the Ona bag. It could be a little better than the Ona, in my opinion (IMO). I’m extremely pleased with the product, the look, the quality, and especially the value.
I can fit my camera gear, my daughter’s snacks and personal items up top. and there is room to spare. This is the perfect bag for my needs. When I am not traveling with my daughter, I can fit more camera gear, or clothing for myself for an overnight.
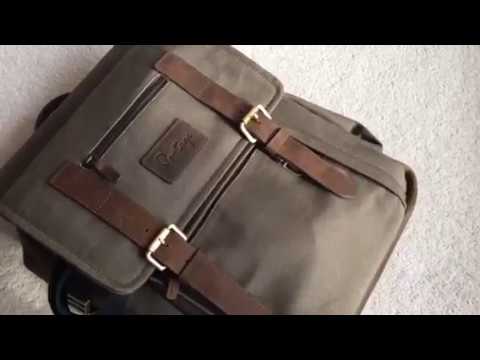
VERY IMPORTANT! This is their generation 3 version
There are Portage bags out there for $99 on the market. They look like identical twins to this v3 bag. But they do not have the following upgrades that ONLY come on the v3:
-Upgraded design with easy access side panel
-Smooth operating YKK zippers and YKK zipper heads
-more, but can’t fit them all here
Weight:
This bag is on the heavier side, for backpacks, at 4.5lbs. But to be fair, it’s par for the course, as this is a stylish/casual bag. Not a bag intended to be used when you’re climbing a mountain or biking. The clasps, buckles, and materials used are not light – their purpose is for style and durability. The bag is for travel, casual shooting, and also portrait shooters (obviously, subjective). The weight of this bag is virtually the same as the Ona, so again, it’s not heavy compared to it’s peers. It’s just a lot heavier than a bag dedicated for the outdoors/hiking/biking/etc.
What fits?
-Two full frame, ungripped Nikon bodies and three Nikon lenses
-D750 attached to 70-200mm 2.8E VR ED FL hood reversed
-D750 attached to 28mm 1.4E ED FL hood reversed
-58mm 1.4G hood reversed
-Two Peak Design hand straps in the front pocket
-HoldFast Money Maker dual camera strap
Notes:
– you could rock a third ungripped body up top, with a 24-70
or your flash(es)
– it comes with several other dividers that you don’t see b/c I’m not using them and probably won’t since my gear is larger.
– for crop bodies and their kit lenses, you’ll fit a lot more in the bag and require the extra dividers. it comes with two of the long three panel dividers that turn. and several single wall panels (all the same size). all dividers have velcro on three sides and are quite heavy duty (they did not cheap out on them, very high quality).
– velcro strips are also included. they are quite long “straps” that (in my example) would be used to hold the 70-200 from falling out. you can see them in the stock images on their site.
– 17″ laptop fits. the laptop pocket is in the main chamber and is not removable. there is no access from outside the bag. it is very well padded.
– you can fit a water bottle on one side, but I would say it’s best for an actual (normal size) bottle of water, not your thermos unless it’s extremely narrow.
– the camera opening is on the other side.
– both sides have a buckle that normally would be used to cinch a tripod to the bag. you could use these buckles to add another (larger) water bottle, or carry an umbrella, or raincoat even. in my case I’ll probably use one side to cinch my camera strap to the bag b/c I don’t keep it attached to the cameras, it’s too bulky.
– the personal area is large and fully adjustable. around 7-8″ of headroom. you can remove the divider that separates the camera gear from personal items. or you can move it up or down. the result is excellent for casual shooting. you can put snacks, change of clothing, or just more camera gear – up top. the divider has velcro on all four sides and is essentially a tray.
– the width of the bag will allow you to carry a D8xx and 70-200 2.8, which is amazing. this is one of reasons I bought this bag! I do not like to change lenses on the go. so I prefer to have two bodies at all times, each with a lens attached. this bag allows me to do that perfectly.
– the front pocket is small and best for business cards and gum. there are a couple slots for memory cards in here. the length of this pocket is 4″, and it’s a little wider than 5″, so this pocket is a bit limiting.
– the pocket under the flap is larger, 8″ long, and about 8.5″ wide. this area will fit more personal items, including your phone if you don’t want it in your pocket. also will fit a battery charger, cables, etc. there are two pockets inside this one, that are best suited for a couple of batteries and your car keys.
Damn you I have the old version. But by the looks of it its worth getting the new one once I have the money. With the addition of the side pocket, better Velcro positioning, easier zipping, and few other features.
Thanks for the video, Ryan. Question… Do you think this bag would be good for a medium-format film kit, like the Hasselblad 500CM, with a couple of spare lenses?