How To Use Advanced Layer Blend Modes Using Architectural Photography with Thomas Brigantino, Architectural Photography Retoucher, Post -Production Services and Visual Solutions at TB | AI.
Let’s Get Started!
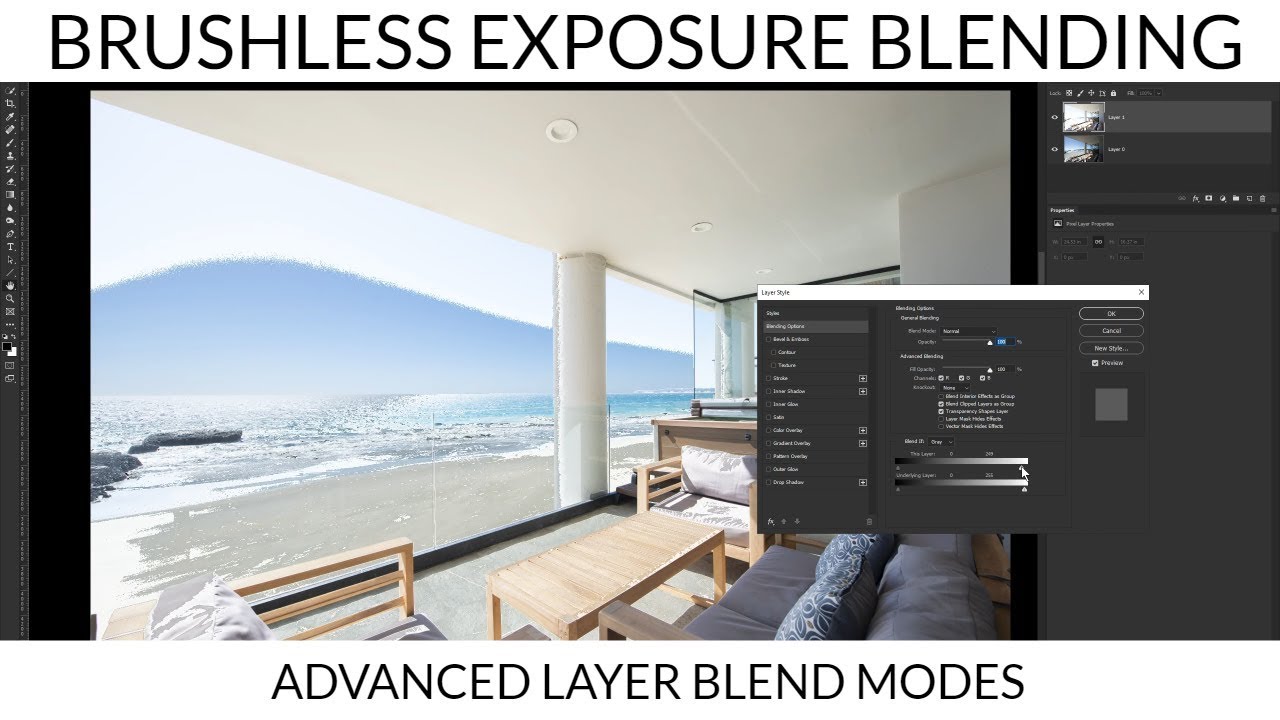
Ii will explain each of the 6 Blend Mode categories (Normal, Darken, Lighten, Contrast, Inversion, and Component) as well as all the Blend Mode in within each category. The graphics in each section will show the outcome of each Blend Mode at 100% opacity unless otherwise noted.
“Normal” is the default Advanced Layer Blend Modes for Photoshop layer in the stacks. Opaque pixels will cover the pixels directly below them without applying any math or algorithm applied to them. You can, of course, reduce the opacity of the layer in the stack to reveal the pixels below.
As the name implies, the Advanced Layer Blend Modes in the Darken category will turn the “Result” colors darker. Anything that is white in the blend layer in the stack will become invisible, and anything that is darker than white is going to have some darkening effect on the pixels below it.
Simply put, this Advanced Layer Blend Modes does not blend pixels, it only compares the base and blend colors, and it keeps the darkest of the two. If the blend layer in the stack and the base layer in the stack color are the same, then there is no change.
The Lighten Advanced Layer Blend Modes takes a look at the base color and blend color, and it keeps whichever one of the two is the lightest. If the blend colors and the base colors are the same, then no change is applied. As with the Darken Advanced Layer Blend Modes, Lighten looks at the three RGB channels separately when blending the pixels.
Lighter Color is very similar to Lighten. This Advanced Layer Blend Modes does not blend pixels. It only compares the base and blend colors, and it keeps the brightest of the two. The difference is that Lighter Color looks at the composite of all the RGB channels, whereas Lighten looks at each RGB channel to come up with a final blend.
Photoshop checks to see if the colors are darker than 50% gray or lighter than 50% gray. If the colors are darker than 50% gray, a darkening Advanced Layer Blend Modes is applied. If the colors are brighter than 50% gray, a brightening Advanced Layer Blend Modes is applied.
Overlay is another of Photoshop’s most widely used Advanced Layer Blend Modes. It is a combination of Multiply and Screen with the base layer in the stack always shining through. Overlay uses the Screen Advanced Layer Blend Modes at half strength on colors lighter than 50% gray. And the Multiply Advanced Layer Blend Modes at half strength on colors darker than 50% gray. 50% gray itself becomes transparent. Also, note that “half-strength” does not mean, Opacity at 50%.
Overlay, alongside Hard Light, is part of the first set of Commuted Advanced Layer Blend Modes in Photoshop. A set of commuted Advanced Layer Blend Modes will give you the same result when you apply one Advanced Layer Blend Modes to the blend layer in the stack, as when you apply the corresponded Commuted Blend Mode to the base layer in the stack, and then reversing the order of the layer in the stacks.
Hard Light sounds like it would have something in common with Soft Light, but it does not. It is much more closely related to Overlay, and they are both part of the first set of Commuted Advanced Layer Blend Modes.
The resulting image loses a lot of detail, and the colors can only be black, white, or any of the six primary colors. Red, green, blue, cyan, magenta, or yellow.
Exclusion is very similar to Difference. Blending with white inverts the base color values, while blending with black produces no change. However, Blending with 50% gray produces 50% gray.