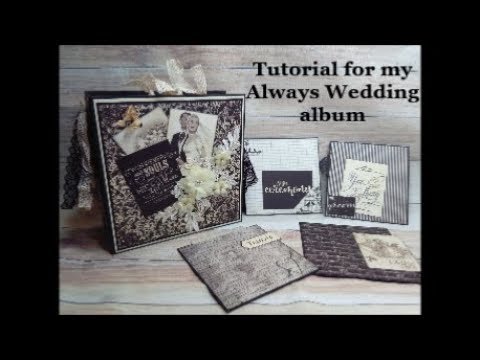
I created this tutorial to show you how I made my Always Wedding album.
Link to view completed album:
Hope you enjoy!
If you have any questions please let me know.
Page base (cream)
8 1/8 x 8 1/8 (4)
8 1/8 x 9 1/8 (4)
Score 1/2 on 9 1/8 side the rotate and score 1/2 on other side
Page base mat (black)
8 x 8 (8)
Page 1
8 x 8 1/2 (1)
Score 1/2 on 8 1/2 side
6 1/8 x 6 5/8 (2)
Score 1/2 on 6 5/8 side
2 1/2 x 7 1/8 (2)
Score on 3 sides starting on 7 1/8 side
1 x 6 (1)
Page 2
6 1/8 x 12 (booklet for pocket)
Score at 6 on 12″ side
4 x 7 1/2 (2)
Score 1/2 on 7 1/2 side
Page 3
6 1/8 x 8 1/2 (3)
Score at 1/2 and 6 5/8 on the 8 1/2 side
4 3/4 x 7 1/2 (1)
Score 1/2 on 7 1/2 side
Page 4
5 3/4 x 12 (booklet)
Score at 6 on 12″ side
8 x 11 (1)
Score at 1/2 and 6 3/4 on 11″ side
3 x 7 1/4 (1) Score on 3 sides
Page 5
8 x 8 1/2 (2)
Score 1/2 and 4 1/2 on 8 1/2 side
1 x 3 7/8 (2)
6 1/2 x 8 7/8 (1)
Score 1/2 on 3 side starting on 8 7/8 side
Page 6
6 x 12 (booklet)
Score at 6 on 12 side
4 1/8 x 10 1/4 (3)
Score at 1/2 and at 3 3/4 and at 7 on 10 1/4 side
Page 7
4 3/8 x 8 (1)
Score 1/2 on 4 3/8 side
5 x 7 1/2 (1)
Score 1/2 on 3 sides starting on the 5″ side
8 x 8 1/2 (1)
Score 1/2 on 8 1/2 side
Page 8
6 x 12 (booklet)
Score at 6 on 12″ side
8 x 11 (1)
Score at 1/2 and 7 3/4 on 11″ side
5 x 7 (2)
Score at 1/2 on 7 side
6 x 8 1/2
Score at 1/2 and 6 1/2 on 8 1/2 side
1 x 5 (2)
Medium weight chipboard
8 3/4 x 9 (2)
4 x 9 (1)
Cardstock to wrap chipboard
12 x 12 (2)
Stack the deck binding
2 1/4 x 8
Score at 3/4 and 1 1/2
3 3/4 x 8
Score at 3/4 and 3
Inside Front and Back covers
6 3/4 x 9 (2)
Score 1/2 on 3 sides starting on 9″ side
6 3/4 x 8 (2)
Score 1/2 on 6 3/4 side
8 x 8 (2)
Score at 1/2 on one side
Thanks for watching!
Have a great day!
Just wondering what size of magnets you use?
woow, beautiful
First time watching this tutorial excellent as always
Very nice tutorial!
I just love your videos. You're so warm and your tutorials are excellent, easy to follow. I'm making this for a friend at work. Thank you for what you do!!!!
Hi loved this tutorial looks easy when ur doing it , well we will see . Think I will have a go. Would love to see a part 2 of the finished album I'm sure it turned out amazing . Looks gorgeous in the photo would love to see it page by page . Thank you for sharing x
Like your iam do one at the same time you are but u didn't say what size off the design paper
I want know can you give the size off the design paper size for your wedding album I looking to make one
I just wish my hands were as steady as yours!
Great tutorial! I have watched over 20 times making this same album for a friend thank you so much! You are awesome. Love watching your tutorials!
How did the Park Lane cardstock hold up? Any cracking, did it hold up to the glue, etc?
its perfect, how many 12×12 pages please? (french), thank you.
Thank you for the link!! That really helped! ❤️
Thank you so much for this informative tutorial. Going to use this to make a dear friend a wedding album. You were so informative.
Yes it is the punch I was asking about, once again thank you for your outstanding help! Huge fan!!
Thank you for your answer!! I have another couple of questions if you don’t mind. Would you by chance recall where you found your metal “memories” embellishment, as well as the name (if it’s from a punch) or what you used to make that beautiful decorative cutout for the pocket on the left side of the booklet where you’ve stamped the words “Now and Forever” on the right side? Thank you for the great help you’ve given!
Hi Laura, This album is breathtaking.. perfect for my wedding photos ❤ I bought all of the supplies to try and make this (I've had the supplies for awhile now) I'm excited to make this, but I'm also nervous 😨 I just don't want to mess it up. I think I've watched your video 7 or 8 times now. I do get more confident every time I watch it (because your instructions are excellent 🙌🏽) so hopefully I will be able to make it soon 😨 lol.
Hello Laura,
Such a lovely album and a lovely, clear tutorial as always. Laura, reference the glue, the glue is fantastic, I now use it for most of my crafting. Reference the unblocking, I have come across from Scraperfect, “no-clog writing cap”. The large is the one you need to fit the art glitter glue bottle.
Thanks for sharing – you are great
Thank you Laura for this tutorial especially for showing everything including the magnets, decorative paper, decorative punches, and etc. This really helped me in putting the whole process together. I hope to do this album soon. I actually have a niece and a nephew who are both planning weddings so I would love to do these as gifts to them. Thank you Laura. Have a wonderful day..
Thank you great tutorial. Hugs Joy
Wonderful!!!
I want to thank you for sharing with us a well explained tutorial on a beautiful project !!!
Thank you for making the measurements available !!! I use Google Translate to communicate and thus narrow the distance between us, I really admire your work !!!
A big hug from Brazil 🙂