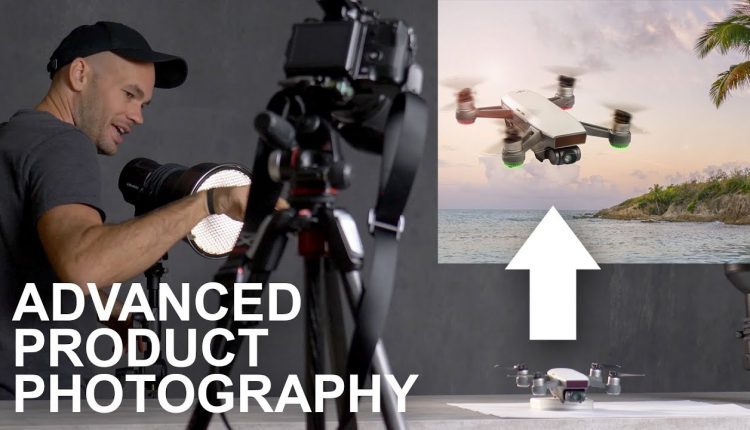
Advanced Product Photography Tutorial From Start To Finish
Did you like the music in this video? Check out Musicbed and get your first month free on any subscription but “personal” to feature in your videos by using code: FSTOPPERS
Add easy color grading presets to your images using Alien Skin. Save 10% off any purchase from by using code: FSTOPPERS –
Use the same gear as Lee did in this shoot:
FUJIFILM GFX 50S –
FUJIFILM GF 120mm f/4 Macro Lens –
Manfrotto MT190CXPRO4 Carbon Fiber Tripod –
Manfrotto XPRO 3-Way, Pan-and-Tilt Head with 200PL-14 Quick Release Plate –
This is a free product photography tutorial. In this video Lee Morris photographs a DJI Spark Drone and a separate background and then composites them together in Photoshop.
For more high end tutorial check out

Why not talk to the camera… It feels like you are talking to someone else and not your youtube audience.
I'm liking the direction your content has been going in recently. Never bothered subscribing because I wasn't too interested before (you did have a video I liked here and there). Now I'm enjoying most of your recent videos.
Really Cool!
Hey i'm just a beginner but i gotta say that i felt like while you was focusing on the subject deeply, i would focus more on the composition. Readers go from left to right and the leading lines are the total opposite, and i feel that is why you said that you see the tree as a distranction. Thank you for your tutorials, i learned alot from you guys 😁
impressive videos. I love it. Follow my channel if you like!
I watched this video just to see how you were going to show the motion blur of the props with strobes. Disappointed you opted to fake it.
For this kind of product compositing, I normally use a very different flow.
1. Get your background. This will motivate the way that you light the product, in light direction, color, and hardness.
2. If you have the option, shoot the product in place in what will become your background, to get the scaling and blur levels right and get a better look at how the highlights and shadows will fall on the actual piece. (This is harder for my work, since I'm often compositing into an existing shot chosen by somebody else, but it's really useful if you can do it.)
3. Set up the product in studio in the right orientation and with the camera at the right distance from the piece (to get the right perspective aberration) and then set the lights to match what you have in your scene as closely as possible.
4. Then do your compositing, which is both easier to do and very believable.
For this specific image, I think I would at least try to shoot with a dragged shutter and hot lights with the motors running and the drone zip-tied to something very heavy like 1-2-3 gauge blocks. Might not work, but if it does, life gets much easier. I almost always try the easiest way first, because sometimes it works (Woo Hoo!) and when it doesn't work, it usually tells me something, often many things, about what I need to do the hard way. At the least, it means I don't have to rely on my imagination about what things might look like anywhere near as much.
All that said, a really interesting piece. And the sponsorship inserts weren't a problem for me at all.
6:34
EXCELLENT! I like the way that you modify strategies along the way – kind of like your average photographer has to be adaptive. One change you could have made would have been to have used focus stacking. I don't believe that the very back of the drone is in critical focus.
Really fantastic video! I'd love to see you now take the drone to that beach and see how close you can get "in camera". I think that'd be a really good video series showing different techniques to achieve similar/the same results.
This is awesome, this channel has so much variety & I like how involved you guys are. I don't like voice over videos since it doesn't give use the connection neither inspiration with the editors/editing.
Really liked it! If I was to give constructive criticism (like you done get enough). I wouldn't tell your audience "I've never done this before". I wanna feel like I'm learning from Brian Rodgers Jr. himself. However, I know you've been full hands on with his work and it is nice to see your skills after working so close with him. It makes me feel like I should buy the course. Well done guys/gals. Keep up the awesome work.
I'm liking it. In depth tutorials are awesome. And having them sponsored and free would be AWESOME!
why not just take the prop off and take a picture of it?
Great job! Hopefully these catch on.
32:11 now I know why the music in this video was so loud at some moments!!! 😀 😀 😀
Awesome, we love free lol!! Thank you…
sick! love the tutorial…been experimenting with product photography lately to add to my offering!
I think a slightly blurred background would have worked well !
Thanks for this…
Thanks for finding sponsors so you can post longer tutorials. This was very helpful and informative. Keep up the great work!
Great video guys! Very good instructional help 🙂
Nice job Lee!! I learned a few things and going to try out that Alien skin software.
awesome!
Adding some motion blur to the background might help. Since the photo is like we are planning with the drone with a slow shutter speed, adding some blur to the background will help it to be more realistic.
Great video. Thanks very much for the knowledge.
Love it!
So on a scale from 1-snapshot to 5-unforgettable, where would you put this image???